Thursday, September 30, 2010

the 2 little birdhouses

OK... Can someone turn off the rain! It's been raining all week, and I'm a little over it! Don't get me wrong, I LOVE THE RAIN......But this is a bit much! ..... I've written this blog once already....the power went out, and I lost the post! But I'm back......
........So............
I only got 2 birdhouses done yesterday.... I used the lefts overs from the signs I've been making. I haven't showed you the other signs I made yet (The rain has totally killed my picture taking skills...Everything is just so dark!) .......I used the tongue compressor sticks to do these. Not used sticks, but I guess you could use those, too..... You can buy a 'fresh' bag from the craft store:) Anyways..... Here they are in all their glory... As you can tell, I'm not all that thrilled with them, but they will work...... I made some different ones today, but they still need roofs.... I probably won't get to them though until later in the weekend. Tomorrow, I have to spend the day with the doctors...and then Saturday..... Get this!!! There's actually going to be a dollhouse show in my town!! Well, not in my town, about an hour away, and I'm excited.... I just hope the 'tests' tomorrow don't wear me out too much! I really, really want to go to the show!!!

Next is the bottle of crackle medium I've been using.... I do believe it came from Michael's, but It was quite some time ago! I've used it a lot, and I've only been through 1/4 of the bottle.... It seems to last forever.

And then we have kitty pics! I have LOTS of kitty pics, just don't want to go overboard with this whole sharing thing...SO here are a few of my favorites:

First is Jasper........ He's upside down because that is how he was sleeping.... He's soooo freaking sweet!


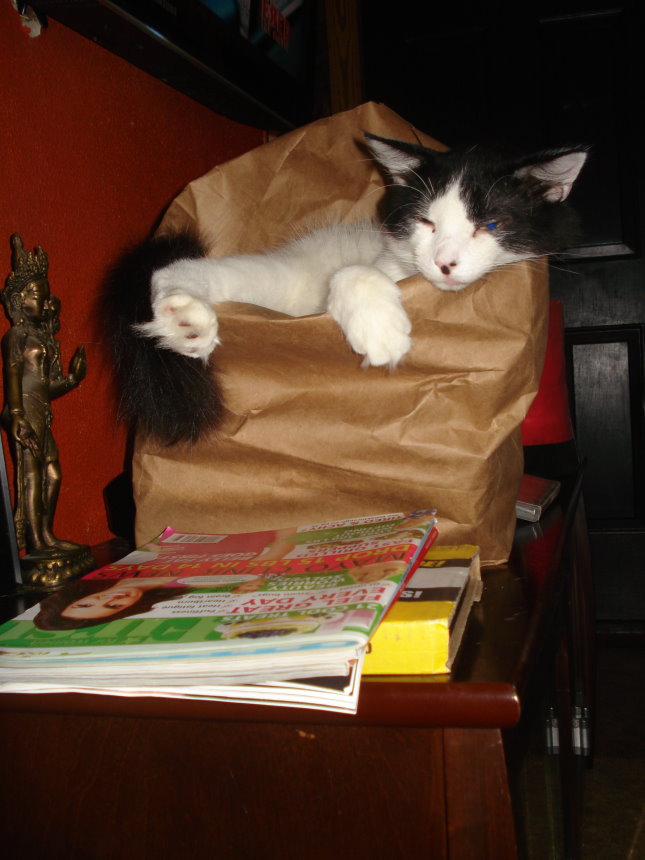
And what about another pic of Freddy? Here he is sleeping in a brown paper bag full of magazines...


And then there's Rufus (Fred and Jasper's Daddy!) .....Ever time I see this pic in my picture file, it cracks me up! I just love how they sit on their butts like this..... so funny!

Ok then...Here's me wishing all of you a wonderful weekend!! :)

Until Next Time...........

Wednesday, September 29, 2010

Getting the rest of the Crackle out of my system...

Nope! Nothing is safe around here at the moment..... If it sits still, it's getting crackled, HAHA!
So, these little houses aren't mini...but I thought I'd share them anyways. Found all 6 unpainted for $2.... Actually it was one of those cases where I saw them at the thrift store, and thought they were too expensive, so I waited....


I painted each one brown, then went back over it with a thick coat of crackle medium...Then I painted each one a different color.....and when they were dry, I sanded the edges down. I still think they need something, but my mind is telling me they are cute the way they are??

Don't you think they need windows, or big chunky numbers...or something??? I dunno~ If I stare at them long enough, it will come to me.....

...but for now, I'm off to finish the birdhouses I've been working on today....I'll be back when they're done........So

Until Next Time

Neptune Festival

While my parents were here, we went down to the beach to check out Neptune Festival. On the last weekend in September, the board work is filled with Art, Food and Sandcastles. This year, we saw the sand castles...... This 'festival' last all weekend, and goes from 1st street to well past 30th street.....so there's lots to see. I was also able to pick up a few small shells for The Painted Lady. ((BTW, I have not forgotten to finish The Painted Lady, I'm just waiting on those last special accessories:D ))


And now for some of the sandcastles...
We'll start with King Neptune himself!

....OK, you gotta make this one bigger and check out this little city! Amazing!

...make this one bigger, too.........and check out the detail on those trees!!

Sorry I don't have a whole pic of this one, I had to crop out all the people..... But I knew some of you would really like to see the dragon:)

...And the last one to share is this: I LOVE the Momma with the baby in her.... and do you see all the little people sitting on the stumps...Pretty cool, huh!

Hope you enjoyed the sandcastles as much as we did..... We didn't make it down to the Art this year, but there's always Next year.... FYI: I used to compete every year in the youth art show here when I was in high school, and even placed every year I entered! So it really means a lot to me to be able to go down there...I just wish I had the energy to see the whole thing.....Not to mention it was so bright, my eyes watered the whole time, My Mom kept trying to buy me sunglasses or a hat or something...... but I'm too stubborn for that:)

So....
Until Next Time!

Friday, September 24, 2010

And the crackling continues.....

Sorry I've been a little MIA this week...... I have lots of excuses.... Wanna hear them?? ......No?? LOL...... Me either.......... Let's talk about fun stuff, ok!! I have my other blog for all the nonsense....

So....... I made some shutters. Actually I just needed an excuse to play with the crackle some more, And I thought they'd make a cute backdrop some where in The Painted Lady (the glass house).

A couple of people had asked about the crackle finish.... So I thought I'd give a few tips. First.... Practice makes perfect. I have crackled A lot of things, and those first few things weren't the best! It is hard, but once you know how...You'll be like me, And Crackle everything!! LOL

First paint your base coat color, and let dry! (I use a cheap brown paint)
Next paint a thick coat of crackle finish on, and let that dry!
Then.... Using a Good acrylic paint ( I used FolkArt brand), load your brush up really good....
Start in a corner and work you way up. You can NOT paint more than one or two strokes, or the crackle finish will smear!! That's the trick really.... Putting a thick enough coat of paint brush and only painting it once. As the top coat dries, the crackle will being to appear. Let this dry before you do anything else with it. (I sand the edges down at this point, and then go back over those edges with a brown stamp pad) I hope this helps..... :)


...... I was trying to find more word stamps in my stash....And came across this:
Wouldn't it be cute in a Halloween house??

Then I made some of these:

These will be perfect in a cake shop, kitchen...... Thought they were supper cute!! (This stamp came from AC Moore's)

And while I'm here.... Here's what the stamps look like that I used on all the other sticks.... I've had it for awhile, so I'm not too sure where they came from, but thought a picture would help. You can use any words really, well anything that is small enough to stamp onto a Popsicle stick anyways. I used single letters to make some Cupcake signs, but it's a little tricky to get the words straight.


And before I leave I thought I'd share a pic of Freddy..... It cracks me up when they sleep like this!!!


......Mom just called to tell me that they're coming down for the weekend!! :)
And my first thought was 'Ohh Sh*t!! I gotta clean this house! Doesn't she know that I've been sitting/laying on the couch all week painting Popsicle sticks!!' lol

Until Next Time.........

Sunday, September 19, 2010

A glimpse into my weekend.....

I had a totally kid free weekend, and wouldn't you know that I sat my butt on the couch all weekend! This is what I got done....
*I cut out little squares of material, folded them up, and put them into drawers/ baskets. I love the one with all the pinks:) Very girlie!! And look at those beautiful fabrics in the bottom drawer of the dresser...Those are from Ira in Finland....((And speaking of Ira, HAS ANYONE HEARD FROM HER??? I sure hope everything is OK!!))
.................Still need to figure out what to put into the top 3 drawers...... suggestions welcome!
*I painted the rest of the chess pieces..... Some days, you just feel like painting.....


*I also made some more signs..... I'm using a crackle medium with these.... And Luving it!! I'll take a better (close up) Picture of them when I'm done.


And then, since I haven't really posted any kitty pictures in awhile......And as any multiple cat owner knows how hard it is too get All the animals to sit together...I thought I'd show you the kitties....I had to bribe them with treats for this picture...... But they're all there......

Well........ That's about it for now..... I'm off to crackle some more signs.....
Until Next Time....

Saturday, September 18, 2010

Got a Little of a Lot done......

Let's see....
I glued the shelves down on my metal rack........ And finally ended up getting the accessories to where I think I want them.... I have to tell you that one of my favorite pieces is in here...You see the Pisces's plate! I just Love the design on it......And No, I'm not a Pisces's...... I'm an Aries, but it was the only plate that the dollhouse store had, And my Bestest friend in the whole world is a Pisces's.....So I bought it:) As you can see I still have some room to fill............Just haven't figured out what will go there yet....


Then I put a white-wash of blue over the doors.....I thought it stood out to much, so I lightened it.....I like it much better this way:) I also went ahead and glued down the things on the door... The little Birdhouses came from Mercedes.... And all the 'things with wings' will be going on the other side. The dragonfly at the top was a charm from a jewelry catalog I had bought years ago. The cat I've had forever, too! It was a lapel pin.... And that last dragonfly was some kind of pendant. I had originally made them (well painted them white) for Katie's Corner (the pink room), but then ran out of room. I'm so glad I was able to finally use them:)


And here is where I'm at today.....Sorry about the plant, didn't realize it had tipped over until after I got the picture loaded. Again, I'm soooo glad I repainted those doors.... They fit in sooo much better now:)
Well, Alrighty then....... I've got errands to run today, but hopefully tonight, I can get just one more thing done:)
See Ya Next Time:)

Friday, September 17, 2010

Just some more Finials...

Found a small chess set, and thought that some of the pieces would make some neat 'finials'....
Whatcha think?? I aged them a little....Ok, I aged them A Lot, lol.


I LOVE the crackle finish!! Adds so much character to an object!!


Just another view......
OK....Off to see what else I can age. Someone! Please take the paint brush away........

Until Next Time........

Thursday, September 16, 2010

Rearranging, and then Rearranging again....

Last night I aged the stuff I had painted white yesterday......I just dry brushed different colors onto what ever it was that I was painting.....The column is from a cake decorating set.....The candle sticks and finials are just wood pieces and buttons glued together and painted.

I just love how they turned out!


This morning I pulled the glass house out.....And Wouldn't you know that that dang piece of felt is about an inch too short!! *&$#*!!! Guess I'm gonna have to use it as a rug instead!


Then I put my thinking cap on and ended up using a piece of real floor tile. We still have a lot left over from when we did the hallway....so it shows up quite a bit. It's so easy to cut, and it's already sticky! You can find them at most home improvement stores...and I've even seen them (by the case) at the Dollar General, and Big Lots.....

Then I had to put everything...well a lot of it....back in and play with it. Just how many times can one reorganize a room before we finally like it??? LOL


And before I go....I just gotta share these with you!! Aren't they awesome...... :D
.....they're not miniature...but thought you'd like to see it anyways....

...OK......what else was there......

Finials....I've been trying to find things to use as finials and today, while looking through my Van Dyke's Restorers Catalog.... I found that they use finials on door hinges...and it got me to thinking that those might work, huh....So I'll have to look into that...No fancy door hinges in my house...Yes, I've already looked. ....and if you don't have above said catalog, I recommend getting one. There's sooooo many ideas for just about everything! Door straps, locks, ceiling tiles, furniture hardware....Like I said, lots of neat stuff to look out. I'm not sure about today....but I know I got this catalog for free a few years ago. It'd be worth checking it out.

....Someone asked about the signs....and thought I'd give you a quick tutorial...... Start with a Popsicles stick, and stamp your words onto it. Then cut it to size. Next... flip it over, and paint it what ever your base color is going to be. Let it dry. Then stamp your word(s) onto the painted side. Sand the edges....and then go back and ink those same edges...smudging is good....Smudging makes it look older.....let dry, And DON'T use hairspray to set it. I did this with my first set, and it made all my letters run. The bf said it only adds to the age/character of them, but me being a perfectionist, I had to redo all of them:)


Ok...That's it for today, I'm going to go rearrange the glass house a few more times, lol!

....OHH yeah! I remember now.......Whatcha think about me naming the glass house The Painted Lady?? I was listening to something the other day and they were talking about this row of houses called 'the painted ladies', and I really liked the name. It kinds of represents all the ladies who have painted/ and repainted things to be resold at 'this little boutique'......

Ok....I'm leaving for real this time.......
Until Next Time..........

Wednesday, September 15, 2010

A little of this and a little of that.......

Did you ever get a chance to go and visit the Trash2Treasure blog?? If you did then this next picture will look familiar. I love that lady's signs, and figured I needed some mini ones for the shop.... Most phrases came from my rubber stamps...and I used Popsicle sticks for the wood.


I also decided that I needed some of these.....Still have to dirty them up...
The bird house was a charm from Michael's Arts and Crafts store.


Speaking of Michael's.......Have you seen this yet. I do apologize, because I can't remember who's blog I saw it on, but as soon as I saw it, I was thinking it would make a perfect floor for the glass house. It's just regular felt, and at a dollar a piece, It was totally within my budget, lol.


Then as I was checking out, I saw this: At a dollar a pack!!

I dunno what I'm going to do with it yet, but I've never played with it, so I figured what the heck! Thinking I can use it to high-light some of the mossed areas I have to do in the Tree House....I'll let you know when I get to that point....LOL~ I know I never finish anything! Oh Well......Keeps me busy:)
So until Next Time:)

Monday, September 13, 2010

The Hardest Part....

I been steadily filling up the glass house......Guess I need to name it sometime, huh?? Please excuse the mess, I'm still getting settled in here.....


Do you see the wire shelf on the right.....I sanded the shelves down and put a coat of wash-wash on them...Then I repainted the metal. Look familiar Mercedes??? You sent it to me over a year ago......

I also repainted the little chair in the front left corner.......

Do you see how much it stood out before (pic below)? I think it looks a lot better lighter (Pic above)!
......Sans! Do you see the cabinet in the front left corner? That's the same one you just put material in.....I made the mistake before of saying that my son had bought it for me, but We both know it came from Mercedes:)

So....I'm still trying to figure out how I want everything, for me this is the hardest part...... I'm good at making it, I just can't arrange it the way I want it. I love it when you see a dresser opened up, and clothes are falling out of it...... Just haven't figured out to achieve that look myself. Any suggestions?? **Oh, I did find the best eye-candy of a blog, Ever! It's exactly what I'm going for!! You should check it out~ http://trash2treasure.wordpress.com./

Until Next Time:)

Sunday, September 12, 2010

Patience paid off Big Time!

A few weeks ago, I was in the thrift store and found this beautiful glass house. It was love at first sight!! Until I saw the price.....They wanted $24.92 for it, which isn't expensive.....it's just too much for my budget! So, I had to leave it there. Went back a week later and it was gone, and I was so upset! I kept telling myself that it just wasn't meant to be and that One day I'd find the perfect glass house. But wouldn't you know it......

It wasn't gone, they'd just moved it......and reduced it, Twice!! My beautiful glass house was now $6.98.......And coming home with me!!! I wasn't about to leave it again!!!

Oh, How do I love this little house!!! ((And as you can see, so do the kitties.....That's Wilbur inside the house.....And that's Otis trying to figure out how he got in there...)

And here's what I want to do with it........I want to make this room into what what a booth might look like at a flea market.... I've got lots of stuff to pile in here.... Just have to figure out how to set it up....And I need a whole bunch of sale tags to tie onto things......

The couch and metal table were a blog giveaway gift from Jody....
The big bird house on the dresser was a gift from Mercedes....
And I made the dresser, the 2 birdhouses on the floor and that blue 'screen' in the back.....It was the doors to a cabinet I had that I took of and added hinges to....


And
.....Look At What I found! Isn't it beautiful?? The colors are really bold, some how the camera has washed them away. But as soon as I saw it, I knew I needed it for my wall......So much inspiration~ From the gnome on the swing to those beautiful daisies! I just love it!!

Thursday, September 9, 2010

Doesn't he look so peaceful??

So.....Do the wiggly mushrooms make sense now??
**I just love this picture:)

....didn't realize I had my own set of mushrooms growing in my yard:) So I used them as a background....

Also got this little guy glued in and mossed....

I think I like the wooden plates as much as I do the mirrors.....

3 gnomes down.....
5 to go.....
????????????
......any ideas?
Until Next Time.....