Showing posts with label polymer clay. Show all posts

Wednesday, July 3, 2013

Mermice

See.. My wondering mind has kicked in again... And I ran into these guys yesterday. 
So they got a coat of sealer.. And sometime over the weekend 3 of them will get listed in my store. Not sure which one I'm going to keep yet, maybe I'll let Cora decide?!

These are what we call around here Mermice... Lol. The idea came from Jill Barklems book Sea Story.. One day I want to build Sandy Bay and so the collection/building/creating part has begun... 

I think I like this story the best because its by the beach. If you can check out my Sandy Bay Pinterest board.. You will see neat things like a kitchen table with seashell legs.. And a bathroom wall lined in razor clam shells. They also eat seaweed:) I'm thinking I could add a lot of interesting seafood to their kitchen. I want to use a lot of the things from the story, but I also want to add things. I have never lived more than twenty minutes away from the beach.. So it just feels right:)

These were sculpted and then hand painted by me before I broke my fingers.. Me and the polymer clay don't get along too we'll these days.. But then again holding a tiny paint brush The Right Way isn't that easy either. One day:)

Until next time...

Wednesday, August 3, 2011

The Lions are up in Etsy

Just wanted to let you know that I got the lion heads listed in Etsy:)

I added a picture to show the hole through the middle:) I can't wait to see what you do with them:)

Until Next Time....

Wednesday, July 27, 2011

A Little of This and That..

So..... I made a couple of Lion heads out of polymer clay. And I used a coffee straw from 7-11 to poke a hole through the mouth. When I originally bought the pendant... I had the same idea as many of you- Turning it into a miniature fountain..... But if you're lazy like me, you'll just use it as an accessory...

I did 5 in the same color, but I won't bore you with all the pictures... But these 2 were some of my favorites:) I did 2 whole ones... 2 that are 'broke' on one side... and then one that is just the face.... I will have a couple of these listed in Etsy sometime next week. ((At some point today I need to get my butt in gear... I've got to drive to West Virginia tomorrow to pick up Cora from camp... then onto DC to get the boys.... and then back home:) No trips planned this time, just A lot of driving! Yuck!
But before you go, I thought I'd share 2 new tins I bought from the thrift store.... Couldn't pass up the image on this one.... Makes me want to mosaic something! Love all the colors!

I also picked up this one.... Couldn't leave it behind.... Goes with my other store cans:)

And then there's this picture I ordered off Etsy from
http://www.etsy.com/shop/MyDollhousePictures . It reminds me of one my Mother has had since I can remember. Hopefully I can remember to take a picture of the one at her house when I'm home..... This one is in the parents bedroom in Cora's house..... This is one of the rooms that I still need to put back together... But I couldn't help showing it to you:) The bed is one of the first things I crackled in miniature:) One day I'll actually get around to hanging stuff up in here. For the picture I just balanced the frame on the back of the bed.

Hope you've enjoyed my pictures.... I sure do like having someone to share them with:)
SO... until next time....

Saturday, May 14, 2011

Wall Art

As usual.... You can tell when I really like what I'm doing, Cause I just can't seem to stop making these.....

I've used different colors....

Here I've used watered down paint to drip down into her crevices.....

This one cracked as I pulled it out of the mold, and I liked the look, so I left it.

When I was taking pictures of them, I took this 'candid' shot...

Here is another 'metal' sculpture... with white dripping down her sides....

The clay must of not been smooth when I cast this one, cause it caused a big crease across her body.... Again it was something that I liked... so I rubbed black paint into it to make it stand out a little more.

The black wholes are from the sea salt I used before I baked it- You can read about it in the last post:)

See how shinny this one is.... I used copper paint as the last layer.

So.... which one is your favorite?? I plan one using one in a roombox I have envisioned.... along with a few of the doll heads I've been painting....... No, I do not have a room box for it yet....lol..... But oneday.....

Hope I'm not offending anyone with my pics..... But the female body is one of my favorite things to paint, draw, sculpt...... And now that I've found a way to do that in Mini.... I'm one happy girl.


Until Next Time.....

How it all began..

Do you remember me telling you about my parents coming down... and the fact that the kids and my Dad found a Barbie on the beach......Well...... this is what became of the Barbie. Turns out it is Mulan and not Barbie, which has made it rather hard to cast a mold of her face. Her face is squishy so when I pushed her head into the mold, her face became flat..... I thought it was funny, so I went ahead and made a cast from it.... The cast is on the left....

In between things last week, I also received this in the mail- The silver man coin:) And so I have made a mold using him, too....

You can see what happened to Mulan's body here..... the first few casts I made I did not include the neck and I really didn't like them, so I went back and made another mold including her neck...I'm using scrap polymer clay for both the molds and the casts. (Hope I'm using the right word, or I'm gonna sound like a big dummy! lol)

I used salt to create the textures.... With the mold I pushed regular salt into it before baking it... and when it came out of the toaster oven, I washed the salt out. Then after I made the cast I pushed big salt(sea salt) into the casts and baked them. When they came out of the over, I just plucked out the salt. Some times you can't get the salt out, which is fine, just run it under warm water and scrub it out with an old toothbrush. By using 2 different kinds of salt, at 2 different times, you create texture that sticks out and some that is pushed in.... You'll understand with the next set of pictures.....


Here's the man coin again.... and the mold I made, and a cast from it.
All of them got one coat of Gesso.... and then were painted with the first coats of color.

Oh.... and I just use regular water as a release agent....

Next post I'll have the finished 'Art pieces'!!

Until Next Time......

Thursday, September 9, 2010

Doesn't he look so peaceful??

So.....Do the wiggly mushrooms make sense now??
**I just love this picture:)

....didn't realize I had my own set of mushrooms growing in my yard:) So I used them as a background....

Also got this little guy glued in and mossed....

I think I like the wooden plates as much as I do the mirrors.....

3 gnomes down.....
5 to go.....
????????????
......any ideas?
Until Next Time.....

Smaller Mushrooms....

Good Morning!
Wanna see the mushrooms I've been working on??


This time I broke out the chalk and dirtied them up a little. I'm not to sure what the wiggly ones are, but they're super cool:) Wait till you see what I do with them:)

Until Next Time.....

Wednesday, September 8, 2010

The Gnome Garden

I got impatient last night, and decided to use what I had instead. The mirrors I have are either Too big, or they're Too small! So I went with a wooden plate instead.........
Whatcha Think?? It'd be cute by a front door, or in a garden........

Monday, September 6, 2010

And then there were mushrooms.....

I've been making mushrooms to go with my little gnomes, and I think I may be onto something here, lol. In other words, I Like em!!

I just need to figure out how to make them smaller...

Look good enough to eat, Right??

I've also been playing around with some other ideas...... I still want to perfect this idea! Those white things got to be smaller and longer?!

And I just love the stalks on these....

I did do some simple ones that still need their spots...... I'll use paint for that!

But for now I gotta find some mirrors, the ones I have are too small!

So, Until Next Time:)

Sunday, September 5, 2010

The Gnomes!

For awhile now, I've been wanting to make a gnome..........so, since I had the clay out, I thought I'd give it a shot. And I couldn't be happier:) The first picture reminds me off the 7 dwarfs going to work......There's 5 gnomes in this pic, but I made 8 total!


Ready for the Gnome Montage??


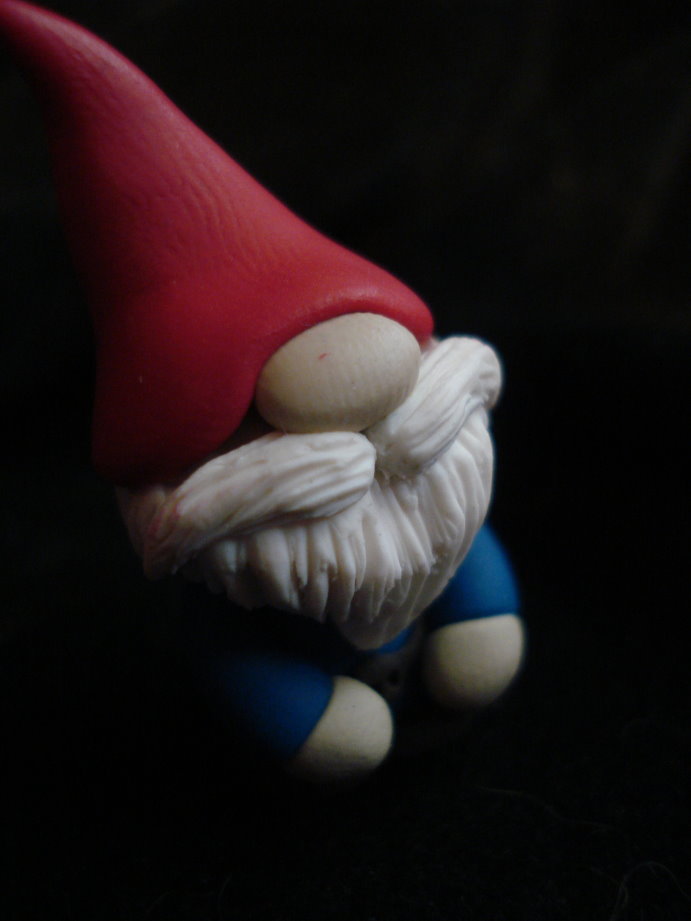
I love this pic! You can see all the detail in his beard!


These guys stand at about 1.5 inches.....Their hat is about the same size as their bodies:)

So...I'm seeing a gnome standing on a mirror with little mushroom and some moss.....Wonder what I can come up with??

Until Next Time....................

Thursday, September 2, 2010

Got carried away with the Tiles....

I've been busy! Or should I say productive?? Either way.....I'm learning as I go and that's whats really important! I've been making Polymer clay tiles.......this is what I have so far......Not too sure what I'm going to do with them yet.....but they'd be cute for a wall in minis or could be used in real size craft projects...... They can be grouted just like regular tiles. You can cut them down, too.

1. Black, white, gray and translucent clay chopped up and pressed down.
2. Tiles made to look like stone......Gray
4. Left over Pineapple cane....chopped up and pressed down....
3. (Yes, I know these are backwards!) 3.....left overs from #4.
5. Landscape cane, chopped up and pressed down.
6. Copper, brown and black clay, chopped and pressed
7. Black and reds.....chopped and pressed
8. Copper........chopped and pressed
9. Translucent and white cane.....sliced, rolled and slightly burned. lol
1,8,and 9 are my favorites:)

Like I said......I've been busy.......
....oh, just in case you're wondering.......they're mostly 1/2 inch by 1/2 inch. All handcut.

Friday, January 8, 2010

And into the dining room it goes...

Thought you might like to see where the Santa Set ended up.....also gives you a better understanding of the scale of it.......

Fit perfectly! And it makes a Great center piece!!

Thursday, January 7, 2010

Another Memory made Mini

Thought I'd show you proof that I have been working over here....lol

So...When I was a little girl, My Mom used to put this really cute Christmas set up on our bar. She took this big oval mirror, put a stuffed (a teddy bear) penguin on one side...and a stuffed snow man on the other. Then she'd put this fake snow stuff around the out side of the mirror....it looked like the 2 stuffed animals were standing on ice! It was one of those things that she put out every year! .........so, the other night I was sitting here and the idea came to me.......Why not make one in mini???

I CAN'T wait to show Mom this!! She's gonna love it! And I'll take more pics when I get it put in Cora's house.........

I love the reflections on the glass!! I used something called SNOW-TEX (by Deco-Art) to do the snow......not to sure where it came from, I've had it in my stash for years!


I've also been making more minis.....some more penguins (sorry the pic is blurry...but I thought it was funny, makes their eyes look like they're moving. LOL)


...made some blue Santas....

.....and made some more Mrs. Claus. The one on the far left is the first one that died in the toaster oven.....and the one on the far right got ate by her hat! Hahaha I'm still not really happy with them....the white is too pink, Gotta remember to wash my hands in between colors!! And their hats seems to be a little Strawberry Cake'ish.......Any suggestions welcome:)

I've also started working on the curtains in Cora's house. I made these outta polymer clay, and then painted it white.

And here is where those are going. It's what I'm going to use to attach the curtains to the wall.....Just have to find some hairspray first, hehe.


Thought I'd leave you with a kitty pic before I go........

Caught Otis and Rufus 'telling stories' again:)

So.....until next Time....