

Once you figure out which one you want to use... you will need to punch to designs next to each other so they look like one continuous design. Then your first cut is going to be where I have the arrows drawn.... and your second cut is where the stitch line is- this line can be moved depending on how tall you want you basket.

I wanted mine short..... but you can still see the pen marks from the arrows on the sides...don't worry!

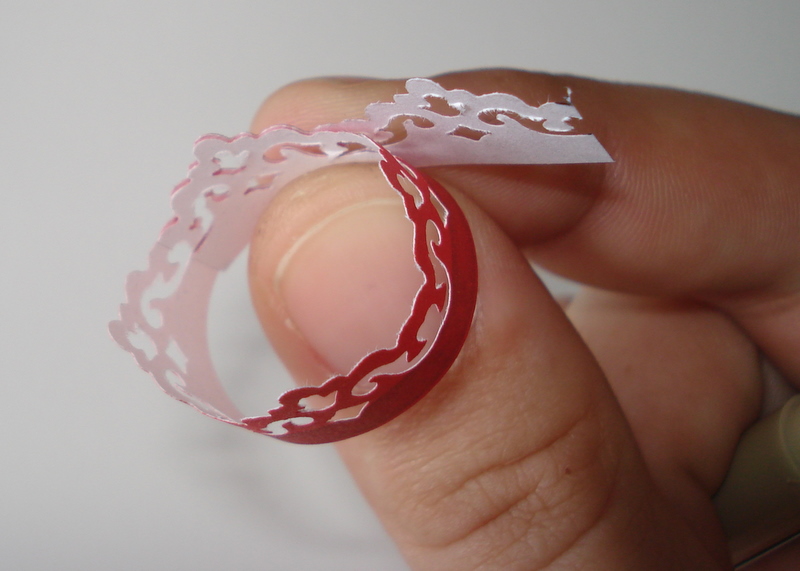
Use heavy paper- I'm using something colorful so you can see it better! But a thicker paper will work better. Anyways roll this piece around a Round pen until the paper is curved....

Then decide where to cut it. You do need some to overlap so you can glue it together. Let it dry.... and then this is where it's just like Marlies' pitchers. Glue piece to paper, cut out and paint. (I'm skipping the details, if you need more.. just ask:)
And here's mine..... I started these a Long time ago.... and have just finally gotten around to finishing painting them. LOL... took me forever to decide what color I wanted them... they have been white, linen, cream, moss, green, silver, and then finally vintage white...

These are going in The Painted Lady..... one day...... And what are they going to hold?

But my mini sea shell collection, of course:)

Hope everyone has a great weekend:)
...until next time...


