Showing posts with label Paper Clay. Show all posts

Friday, June 4, 2010

Come win some mini mail!!

First, we have to get to that point though....so bare with me for a minute!

Like I said in my last blog, I didn't want a traditional bed in this house, so I opted for a nest like cove thingy. I took a cube of Styrofoam, cut it down to size, then carved out the middle.
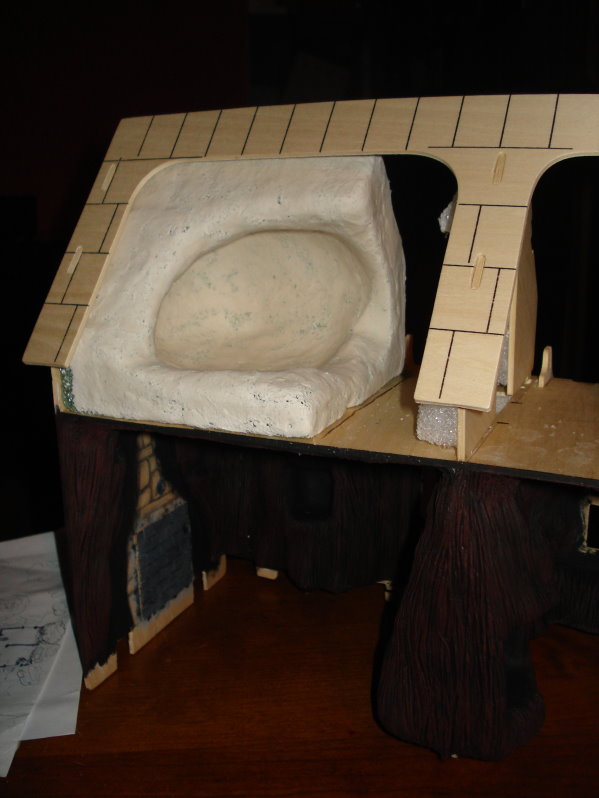

I also have started the middle wall that separates the two sides of the top floor.

One thing I have learned along the wall is that when your building houses from the inside out, things tend to change a little. Walls get bigger, walls shift on you.........things just don't add up! Here I've used blue tape to mark the line that I want to cut away.

OK.....any guess as to what this is, LOL.......


What about now? ......here it's covered with paperclay.......


I think I'm going to play a game with this one, lol........Here's the rest of the room, not that it helps......But any guesses as to what it is? Leave me a comment, make a guess, and on Monday I'll pick a name to win a prize. (You don't even have to be right, Just guess!!) I'm thinking some mini mail might be a good prize.........


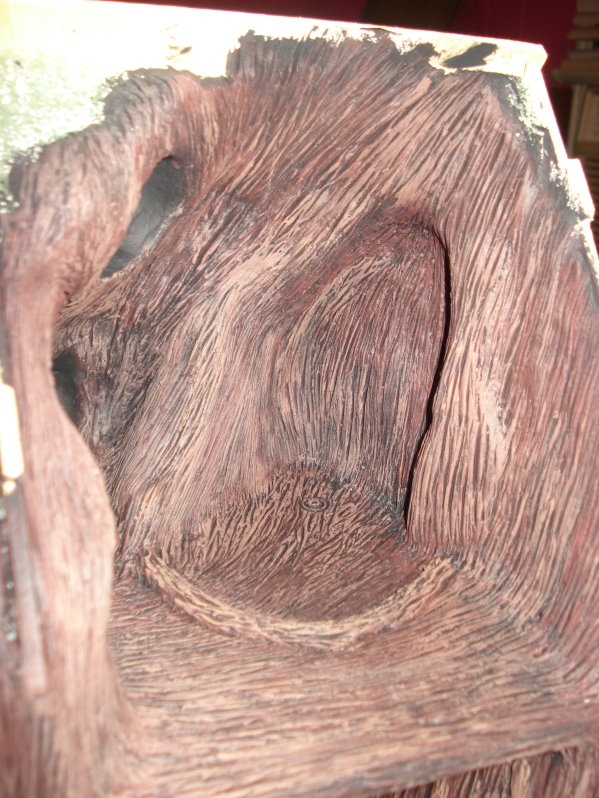
OK, on to the nest.........Here, I've added the second layer of paperclay....and did the scratchy thing.


This is that same area, just a close up.

And again with that black paint....b*o*r*i*n*g!!

But look at what a little bit of brown paint can do.........Nice! I used brown and a golden color to do this, just dry-brushed both colors where I felt like they needed to be...

That brown paint is like magic, isn't it!!

....got the fireplace glued in.......


And then the bf said those miserable words again, "Honey, it's just toooo shinny, chalk it up some!" LOL, Well, it does look a lot better, just wish he had thought of it Before I glued it in.....


So this is where I am with this. I need some 'glass panes' for the windows and the inside will be 90% done.......and I have to start the outside of the tree. But here's where I come to the fork in the road. I want the outside to look like a tree grew around it, but I'm afraid to make it look convincing, I may have to Go Big.....and well, I just don't have any more room.....But, I fear, there's no other way. ((giggles))

My second problem is I need more Styrofoam. Didn't quite realize how expense it is when you need a lot. So I've been trying to recycle. My mother-in-law- recently bought a microwave and gave the Styrofoam it was packed in.......but I still need more. Any ideas on how I can build something 3-D, using something other than Styrofoam. I'm thinking of something along the lines of paper machee.....or something...........any ideas?

Well Alrighty then, this is where I'm leaving you at. Hope everyone has a wonderful weekend!!

~Oh, and if you missed it, check out the last 5? blogs......it's the beginning of this story.
......until next time!

Thursday, June 3, 2010

I can't take another coat of black paint!

Where was I, Oh yes, The paint.......I started to give everything a coat of black paint, and soon realized that I was going to need a whole lot of coats. Even had to thin down the black paint to get it in all the tiny little cracks.....


Then, sometime in between waiting on that paint to dry... I was able to make some door hardware out of polymer clay. I just drew out the design I wanted...traced it onto the clay, cut it out.....and then textured the top.


They're a little bigger then what I wanted....


But, I think they'll do. Oh, and at this point, I've started to do the ceiling.....


I did the ceiling the same way I did the walls.....lots and lots of scratching!


And when I was waiting for the paperclay to dry, I painted more coats of black paint.


I did learn that you can't paint wet paperclay if you want your scratch marks to show. I know, I tried....and ended up with flat mounds instead of beautifully scratched bark!


Just dry fitting everything here to see where I was at.....


All those coats of black paint were worth it after all....lol......that is until I break out the browns....


But first I have a nest to show you.......LOL, Skipped a traditional bed in this house and built a 'cove' instead. You'll see.....
.....next time, ok.

Carving the Downstairs...

First, I had to work on the area around where the door would go. Just traced my door onto the wall, and paperclayed around it.


Had to double check and make sure it would fit....


Then I began working on the wall the separates the 2 rooms...Mind you, I haven't glued the floor or the side wall into place yet.


Next I started working on the other side of the front wall.......(this will be under the window in that storage room I discussed in my my last blog)


Once I had all my walls carved out, and crumb-coated......It was time to scratch. I took my paperclay, rolled it out as thin as I could get it, dipped the piece of paperclay into some water, and then draped it over the area I wanted to work on. I pressed the paper clay down, to make sure it was attached all over, and then I began to run my needle through the clay....Kinda like scratching it in one direction.....over and over and over again. On the left side of the next picture is the before, and on the right is the after.....


Now can you see where I'm going with this?? (Just remember I plan on doing this scratchy thing all over the Whole house! LOL)


...Just a little closer view...


And now things are starting to come together....


Just have to fill in all the cracks....


'Yes, I think I'm going to like this!'


Then the wall got a 'carved' coat of paperclay.


And so did the other back wall for the storage room...

.....next comes the paint........
i think
stay tuned.....

Crumb-Coating My Styrofoam

I think Styrofoam has become my new best friend. I love how easily it carves......and it is soooo easily covered with Paperclay!! Here's a pic of one of the walls. I wanted the inside of this house to look like it was in the middle of a tree....so every wall has to have bark. The bark will come later, but for now we have holes to make. I just drove the cookie cutter down into the Styrofoam, and scooped out the insides......this way I have cubbies I can fill later....


Just a closer look at what I'm talking about...


Once everything was carved out......I began to 'crumb coat' everything. This is where I use a thin layer of paperclay to cover the Styrofoam, so later when I add a second layer, it's not messy. Makes it easier to carve into. Oh, and btw, I used circle and square cookie cutters....Here's the beginning of what the walls will look like. I got smart this time, and decided to do this house from the inside out.


The wall in the back hasn't been crumb-coated yet, but the wall in front has.


This little tiny room will become a storage room.

While waiting for the 'crumb-coat' to dry....I made the window frames and the front and back of the front door. Yes one door is bigger, you'll see one day when it's all said and done.

Also painted the fireplace. And gave it a brick background. Of course the bricks have been painted gray, and everything recently got a coat of that brown chalk.....

I think the hardest part of this whole project has been waiting for things to dry! However, I have been using that time to really think of how I wanted to do things. I'm taking my time, as usual, lol.....and day dreaming a lot. Stay tuned for more of the house, and if you've missed the last couple of blogs, you should check them out. I'm trying to break down what I've already done so far, to make it more interesting for you to read. Hope it helps.....and as always feel free to ask me anything I might of skipped over.......
until next time......

The idea that started it all.....

You gotta love the library! It's full of inspiration.

So, a few months ago I went looking for books about mice in the children's section...and came across one called The Mother's Day Mice.....and inside it's front cover was the most amazing mouse house. I loved everything from the carved acorn above the front door to the grass covered roof.

And I had this house that I bought at Michael's awhile back that has been begging to become something.....but I couldn't see it....until I saw that house in that book. Do you see the resemblance?

....so I began sketching......

...and planning. Here is the beginning of my fireplace.

Can't say the idea was all mine. The idea for the fireplace came out of a book called Craftman Style. I used foamboard to make the base, and covered that with paperclay.....have I mentioned how much I love this paperclay stuff!!


....and here's a tease of what's to come.....

Thursday, June 11, 2009

3 Hours later...

And the rocks are painted!! So is most of the outside painting.
I Really, Really like how dark it turned out!! It has an almost golden yellow glow to it!

*Any guesses as to what I'm watching today?? LOL....

I accidentally kicked the house of the coffee table last night while standing up, and broke some of the joint compound off....So I need to go back and patch the holes before I can finish painting the outside. I'd also like to make some 'wood' out of paper-clay to wrap the windows in. Then it's on to that roof......Still trying to figure out where I want to go with that though. Shingles, thatch, pine cone tips???? The possibilities are endless!!!

I did go back and repaint the front walk way a little darker than the rest of the house, It just made more sense that way! And wait till I get moss and stuff stuffed in here! It's gonna be so neat.....lol, Yes~ I'm starting to get excited now!! LOL


....thought I'd include a picture without the flash.....It always seems to totally change the colors doesn't it! LOL...At least I know I'll still like the colors at dusk! LOL

*Oh...there's another clue to the movie.....not as easy as the first one though! Figured it out yet, LOL.....????
Ok...I'm off to go lie down, I've used up every bit of energy I had painting this morning!!! Until Next time!