Showing posts with label The Mouse House. Show all posts

Wednesday, July 4, 2012

The Poor Fella and the Tree Root

Earlier this year, my bf got himself a blueberry bush. Every day he goes outside and waters it... and talks to it... and picks the grass and weeds from around it. He loves blueberries and was really excited to see all the berries on it.....BUT.... so are the birds, lol. He'll got out and see them just starting to turn colors... and then he'll go back the next morning and it's gone. It's actually been kinda funny... in a cute way. However... He was finally able to pick one the other day and bring it in... And then it got taken again.... It sure does look like a yummy blueberry, Doesn't it?

...So... all that talk about tree roots, got me wanting to work on my Tree House. Yes... It's been a long time:)

First thing was first... I had to go outside (early this morning so my neighbors didn't think I was crazy, although.....) anyways...I had to study it... and take pictures of it.

Then I came in and worked.... I got both sides done.

All I have left to do now is the front and the top...

The top is where my knots will go... When I figure out how to make them look a little better. And....I ran out of paper clay ( I had found 2 packs stashed away:)).... So, My little Tree House will go back on the shelf until my clay arrives:)

Hope everyone is having a great 4th of July:) Be safe!!


Until Next Time

Saturday, February 26, 2011

Post 4 of 4

And this is where I'm at now with the house. I begun to paper clay the whole thing, and ran out of clay....Story of my life....So until then.....

I love sculpting all those lines into the tree, I found it very relaxing! And all you need is a tooth pick! No crazy tools here.

I can Not wait to finish this house!! I still have a lot to paper clay.....And I have the front of the house to finish. But, all in good time, huh!

OK, well I got some pictures taken of some of the birdhouses...... So that's my next mission......
Until Next Time......

The next Phase of the Treehouse

Good Morning! If you haven't read the last 2 posts, you might want to.....It will catch you up to speed!

So, at this point, I had also built up around the top to create what will later become a branch. Eventually, it will all be covered with paper clay, and you won't be able to tell the difference:) I also had to cut out the front stairs to build my own at a later point

I love how you can only see part of the house....How's it's peeking out from the trunk. I do have to admit, that this has probably been one of my favorite projects!

I took the 'trunk' around the back, too. It will all get blended in in the long. I'll be painting this when it's all said and done.

If you look at the top middle of the next pic, you can see how I've started to blend it into the inside of the house.

In the last pic, I've added the front steps, and have begun to paperclay the tree house.

I have one more set of pics to post, before I can get to the birdhouses.....
I was waiting for it to warm up a bit, and it would be nice if the Sun would come out.....Either way....
There are pictures to be taken!

So
Until Next Time...

Friday, February 25, 2011

More work on the Treehouse

So..... If you're just now joining us...skip down to the next blog entry where you can find the first pic and a little bit about what I did....

After the newspaper came the plaster....and it was even messier than the gunk mixture! But, I'll be darn if it didn't work perfectly for what I needed. And it's so easy....Just cut out strips, dunk them in warm water and wrap. I let them sit in the water for a minute to get a little gooey.

I hate to take a step back every now and then to decide where I wanted this trunk to run....
I added some big wads at the top to make some knot holes in the tree.

And then added more plaster
And then more plaster! This stuff dries so hard! I've caught one of the cats sitting on it, and it didn't make a dent anywhere:)
Don't mind the blue ink around the bottom, it's just the marker I used bleeding through...
Oh.... And plaster is messy! Very messy....I don't suggest doing it in the middle of your living room, on your beautiful coffee table like I did....Not that it didn't come of...it was just a real pain to get it off!! Oh, and go ahead and put kitty away! At some point they are going to try and drink out of your water bowl, or they're gonna rub up against your house and get a nice coat of plaster on them....Which is even harder to get off then it was the coffee table....My suggestion....Go outside:)

And now that the treehouse is coming together, I'm getting really excited!

I do have more pics....Just have to resize them!

SO
Until Next Time!!!
Hugs for everyone:)

Testing! Testing!

Alrighty then....look at what I did!! And even better..... I found the rest of my pics! I'm such a moron some times!!! Not that they were where they we suppose to be, but when I uploaded Picasa.....It asked me if I wanted it to search my computer for any other pictures, and I said yes! And it's smart little self uploaded all my pictures! Awesome! Now I just have to figure out how to use the program.... So I figured I'd start with the Treehouse.

You only get one pic for now....I'm still figuring stuff out....but just hold on, cause Ya know I'll be back with more! Besides I need a break from reality right now, and what better way then to blog, lol!!

Well I had to forgo the Styrofoam idea...didn't have the money, and then I came up with a cheaper way to build the base....Remember, not to long ago, I told you about the model train DVDs that I got from the library....there really is some good info to be learned. Anyways.... So I took a bowl of water, and added Modge Podge to it.... Then I bunched up a wad of newspaper, soaked it in the mix of gunk before I stacked the wads of paper on top of each other. Then I paper mache'd it...took strips of newspaper and layed it over the wads to create a surface to work on. And then Ah-ha...... A tree trunk started to take shape!


OK...Hold on.....I'm off to get the rest of these....Then hopefully here in the next few days I can get pictures of all the birdhouses.....

Sunday, July 11, 2010

See I didn't forget about it!

It just takes me Forever to finish something. LOL........ So with that being said, I did get a little bit of work done on the mouse house this past weekend. I found a piece of velum that I fell in love with and used it as the windows for both the upstairs and the downstairs. I didn't want a clear window, I wanted something with a little interest.


I got the door hardware glued in..... And the floor.....


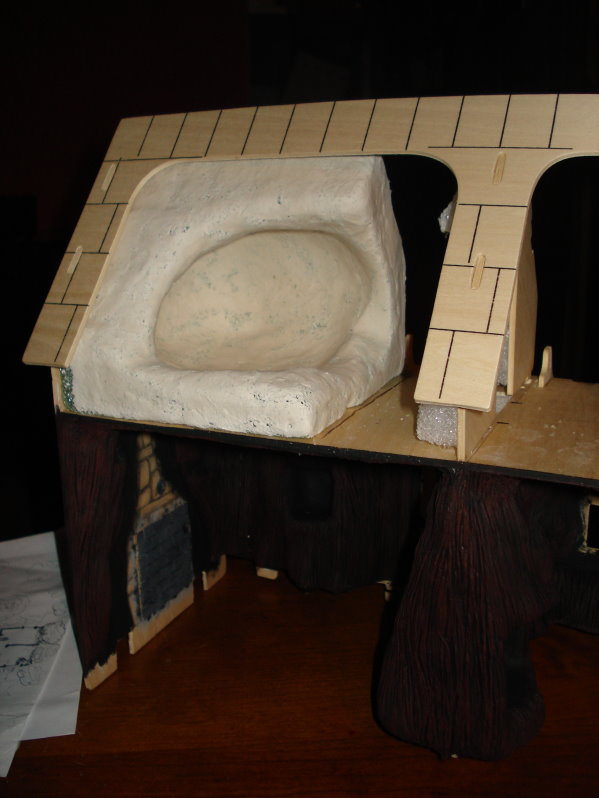
And then I started building up the sides of my house with foamcore board (that's what I had....so that's what I used)


Once I get all the sides glued on, I will go back and plaster in the holes.....Then I'll go back and cover that with paperclay to create the bark on the tree......


It's starting to come together now........

If I could just find the energy to finish it now..........

Thursday, June 10, 2010

Mini Updates...

Looking through some pictures the other night, I realized that I've loved treehouse houses a lot longer than I thought. Wish I still had this one to play with......Yup~ that's me in the pic!


I promised you yesterday an update on my minis.....so here goes:
Meet the mouse family! Yes, this poor family is still in the box~ and shall remain there until the house is done. They will reside in the Treehouse.....Just have to come up with a better name....I don't like that word 'milky'. LOL, I'm sure the name will come to me.....just have to stop thinking about it, huh?!


And last but not least........Look at the furniture I got for Marshmallow Manor. Calico Critters have a whole line of furniture...and every set comes with lots of accessories! I'm on the hunt for the bedroom set now......they're not cheap, so I my have to wait till my next birthday:)


See....for the most part the house is still as I left it.....You know what it is.....its those windows, well...the lack of windows that bothers me. And a front door would of been nice. We're not even gonna talk about that dusty floor either......lol, at least there is a floor....the upstairs is floor less. Maybe curtains would help?


Well......that's about it for now. Busy day today, and if I don't get my butt in gear, I may never leave the house.

So......until next time......

Friday, June 4, 2010

Come win some mini mail!!

First, we have to get to that point though....so bare with me for a minute!

Like I said in my last blog, I didn't want a traditional bed in this house, so I opted for a nest like cove thingy. I took a cube of Styrofoam, cut it down to size, then carved out the middle.


I also have started the middle wall that separates the two sides of the top floor.

One thing I have learned along the wall is that when your building houses from the inside out, things tend to change a little. Walls get bigger, walls shift on you.........things just don't add up! Here I've used blue tape to mark the line that I want to cut away.

OK.....any guess as to what this is, LOL.......


What about now? ......here it's covered with paperclay.......


I think I'm going to play a game with this one, lol........Here's the rest of the room, not that it helps......But any guesses as to what it is? Leave me a comment, make a guess, and on Monday I'll pick a name to win a prize. (You don't even have to be right, Just guess!!) I'm thinking some mini mail might be a good prize.........


OK, on to the nest.........Here, I've added the second layer of paperclay....and did the scratchy thing.


This is that same area, just a close up.

And again with that black paint....b*o*r*i*n*g!!

But look at what a little bit of brown paint can do.........Nice! I used brown and a golden color to do this, just dry-brushed both colors where I felt like they needed to be...

That brown paint is like magic, isn't it!!

....got the fireplace glued in.......


And then the bf said those miserable words again, "Honey, it's just toooo shinny, chalk it up some!" LOL, Well, it does look a lot better, just wish he had thought of it Before I glued it in.....


So this is where I am with this. I need some 'glass panes' for the windows and the inside will be 90% done.......and I have to start the outside of the tree. But here's where I come to the fork in the road. I want the outside to look like a tree grew around it, but I'm afraid to make it look convincing, I may have to Go Big.....and well, I just don't have any more room.....But, I fear, there's no other way. ((giggles))

My second problem is I need more Styrofoam. Didn't quite realize how expense it is when you need a lot. So I've been trying to recycle. My mother-in-law- recently bought a microwave and gave the Styrofoam it was packed in.......but I still need more. Any ideas on how I can build something 3-D, using something other than Styrofoam. I'm thinking of something along the lines of paper machee.....or something...........any ideas?

Well Alrighty then, this is where I'm leaving you at. Hope everyone has a wonderful weekend!!

~Oh, and if you missed it, check out the last 5? blogs......it's the beginning of this story.
......until next time!

Thursday, June 3, 2010

I can't take another coat of black paint!

Where was I, Oh yes, The paint.......I started to give everything a coat of black paint, and soon realized that I was going to need a whole lot of coats. Even had to thin down the black paint to get it in all the tiny little cracks.....


Then, sometime in between waiting on that paint to dry... I was able to make some door hardware out of polymer clay. I just drew out the design I wanted...traced it onto the clay, cut it out.....and then textured the top.

They're a little bigger then what I wanted....


But, I think they'll do. Oh, and at this point, I've started to do the ceiling.....


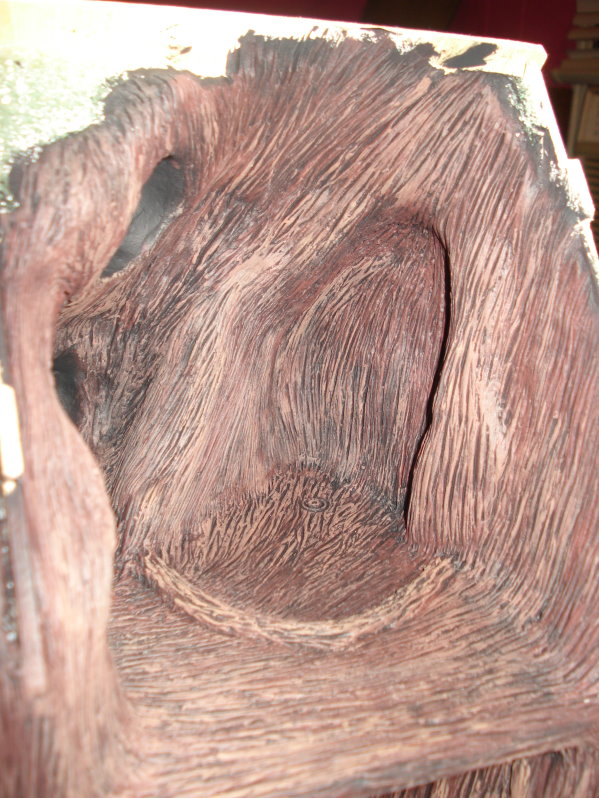
I did the ceiling the same way I did the walls.....lots and lots of scratching!


And when I was waiting for the paperclay to dry, I painted more coats of black paint.


I did learn that you can't paint wet paperclay if you want your scratch marks to show. I know, I tried....and ended up with flat mounds instead of beautifully scratched bark!


Just dry fitting everything here to see where I was at.....


All those coats of black paint were worth it after all....lol......that is until I break out the browns....


But first I have a nest to show you.......LOL, Skipped a traditional bed in this house and built a 'cove' instead. You'll see.....
.....next time, ok.