Showing posts with label baskets. Show all posts

Friday, June 8, 2012

I finally made something for me:)

I got a little side tracked yesterday... and decided to work on a project that I've been working on forever:) I LOVE these little baskets. I made them from paper, applied 10 coats of paint, crackled them.. and then went back and 'rusted' them. I think I went a little overboard on the rust, But I love where this is going;) Last night I made big fluffy towels to go in the bottom baskets, sheets to go in the other basket... and a stack of blankets/sheets... all tied up with blue bows:) I pulled one of my candles out... Then I also brought in a few gifts from Mercedes:) The table came from her- I have since repainted it... and she also made the little containers with the labels on them. This is where I learnt to 'rust'... not sure I've got it down like she does, but I'm working on it:) Thanks Mercedes:) Oh.. and the big bottle of 'bubble bath' in the bottom basket came from my own handmade collection- it just needs a label:)

I can't tell you how much I love this whole scene. I'm thinking of a Guest Cottage by a beach somewhere... are you?

Just to show you what I started with.... The back basket has been crackled but not 'aged' yet.. Where as the basket in the front has had a layer of brown added to it...

Then I went back over with 'paint' to add the rust spots. I used copper paint on the round basket, but thought it was too shinny... So then I used a dark orange and it was to bright ... finally I found a color that looked just like rust- red oxide? I think... and it worked perfectly. So if you look REAL close each basket is just a little different..

And from a distance, they look Great:)

Now I just need to build something for them to go in:)

Until Next Time:)

Friday, September 16, 2011

Easy Basket Idea...

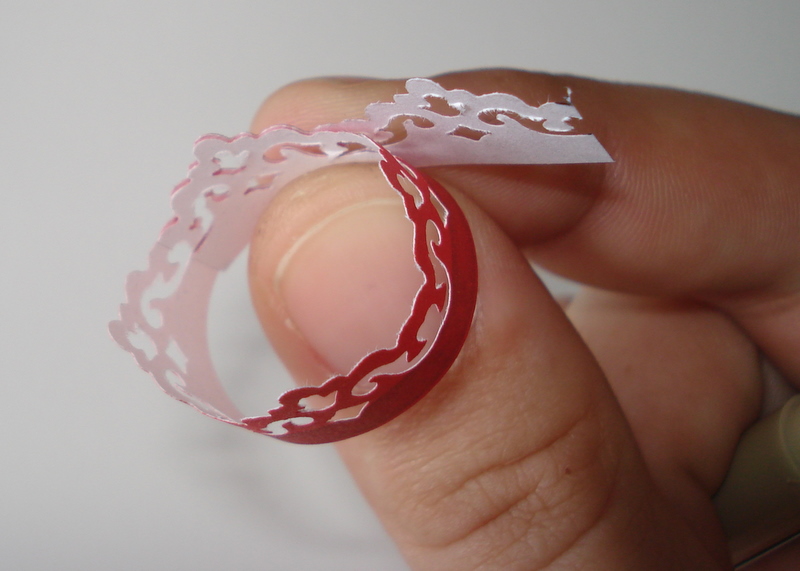
My Mom gave me these hole punches that she no longer needed, and it gave me an idea... I thought they'd make some really pretty baskets!

Once you figure out which one you want to use... you will need to punch to designs next to each other so they look like one continuous design. Then your first cut is going to be where I have the arrows drawn.... and your second cut is where the stitch line is- this line can be moved depending on how tall you want you basket.

I wanted mine short..... but you can still see the pen marks from the arrows on the sides...don't worry!

Use heavy paper- I'm using something colorful so you can see it better! But a thicker paper will work better. Anyways roll this piece around a Round pen until the paper is curved....

Then decide where to cut it. You do need some to overlap so you can glue it together. Let it dry.... and then this is where it's just like Marlies' pitchers. Glue piece to paper, cut out and paint. (I'm skipping the details, if you need more.. just ask:)

And here's mine..... I started these a Long time ago.... and have just finally gotten around to finishing painting them. LOL... took me forever to decide what color I wanted them... they have been white, linen, cream, moss, green, silver, and then finally vintage white...

These are going in The Painted Lady..... one day...... And what are they going to hold?

But my mini sea shell collection, of course:)

Hope everyone has a great weekend:)

...until next time...

Wednesday, June 30, 2010

I Got The Basket Bug Now!

Remember the basket tutorial One Inch Minis' http://1inchminisbykris.blogspot.com/
posted a few days ago....Yeah! Well, now I hooked on making baskets! LOL.

Well, let me tell you the story! Remember this dresser?? Kim from http://flowerkim.blogspot.com/ had suggested I make baskets to go in the dresser, and I couldn't agree more. So when I saw the tutorial, I thought how perfect! So, I made one, painted it instead of staining it.......and really liked it. Then I decided to make a couple to go on the bottom shelf.....So I 'wove' 2 up, and realized they were too little, so I made them into one inch square baskets (the 2 on the top shelf)...... Then I made 2 more (they're the ones in the bottom picture)....and they were too big. So, determined to get 2 baskets made that fit, I made the 2 you see one the bottom shelf of the dresser! Now that I have 7 baskets.....LOL...I gotta figure out what to do with them.

.....After I realized these were too big, I added the handles......I also aged the bottom one.


So............Now I gotta find something new to keep my mind busy...maybe I need some smaller baskets?! LOL
Until Next Time!

Friday, August 8, 2008

My first basket

Check out my friend Sofia's page. She had some baskets that she made from string and glue.......and last night I tried to make one. Not too bad.....I need to work on getting it level, but all in all it was fun to try......and very messy:)I'm sorry I don't have any pictures this morning......
My new meds are making me sleep like a baby! But I do have some funny pictures of Otis
to share! I love how he sleeps with his feet propped up on the walls......Good thing he's a house kitty or I'd have paw prints every where!

Oh, and fatty thinks he can sit on the balcony. Do you see his belly hanging over the side? Hahaha ~I sure hope he doesn't try to sit here once we get the railing up?!?!