Sunday, December 30, 2012

Because it's about making memories

I made Christmas simple this year. I am running out of energy for Everything, so I have to pick and choose my battles.... And I wanted to enjoy Christmas. So this year was the first year we didn't put up a tree. Yes, it made me sad- but I just didn't have the energy to fight Otis off everyday... and wanted to put my efforts elsewhere this month. But after the kids went to bed Christmas Eve- I felt like a Bad Mom for Not decorating... and so I pulled out the 'important stuff. After all- this will be the last year Drew will be home for Christmas. ((He got accepted into the diesel program at UTI in PA and will be leaving me in August for at least a year.)) So...I felt lke I had to do something...
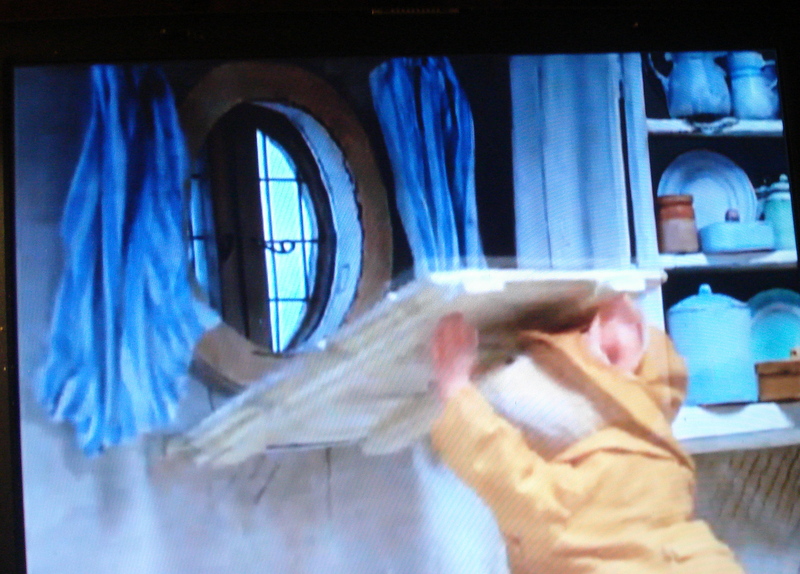
 So I decorated the curtain rod. Please excuse my living room. Thats all I have to say, lol.
There are certain things that make Christmas...
The angel on the top of the tree-
Or as we do it in our house-
The Barbie that sits on top of our tree.
So She got to sit in the center...Couldn't forget the Barbie, lol.
I broke out the scrapbook paper garland...
And hung a few Glitter Balls....
And even used my Dragonfly lights...
Well.... The kids thought it was funny:0 And that's all that mattered to me:)
 So..... how do you trick teenagers.
 I mean- by the time the reach this age- they get hard to buy for. You don't just want to give them money- cause that's no fun. Well- to them it might be. But I like to see them open gifts. And they want to shake everything and try and figure out what stuff is..... So what do I do.... I find the biggest boxes I can and hide their stuff in it. So they can shake it all the want- They aren't figuring out nothing! One year we filled a box with all of my son's old clothes and taped his playstation game to the bottom of the box. He was sooooo confused.... and we laughed so hard! I must warn you though- make sure you buy extra wrapping paper- or you will find yourself wrapping only a half a box on Christmas Eve like I did:D  But don't worry- the actual gift was wrapped too, inside the box. Gotta have double protection with teenagers!
 After we visited with everyone here, We took a trip up north to visit my parents for a few days.
OK.... I'M Sorry Mom for posting this picture (Mom doesn't like her picture taken)
- but I think it's cool- so deal with it:D
I took several pictures of everyone opening gifts... and it seems my Mom had someone there with her- do you see the orbs? Well- they're not in my other pictures- only in the pictures with her.... ?
((I know, I know... some people say dust... I'd just like to think differently:))
BTW.. She's opening a beautiful watercolor painting of Tugboats.
Mom loves Tugboats!
 But the most interesting part of the trip was watching these two.... What started as an oil change turned into "My engine needing to come out so they could get to the oil pan out because the plug/bolt in the oil pan was stripped and wouldn't come out.) And OMG.... was it funny. This is my son on the ladder trying to tell his Grandfather that it wasn't going to work.... and that's my Dad telling him it IS. What a mess!!
 This is why my son is saying it wasn't going to work.... Grandpa was going to hang my engine of this contraption... Now in his defense- that is a 30 ton strap.... However- I don't think those are 30 ton rafters, if you know what I mean..... Well.... The engine never came out... grandpa ended up with a black eye somewhere in there and 8 hours later my oldest son was driving my car out of the garage. Oh... and the heater had died on the way up there- so they had taken a look at that- seems a bunch of napkins had fallen behind the glove box and caught on fire- nice. My Dad just keep saying he didn't know how we had gotten up there. And I keep telling him it was because my car Loves me:)
 And before I go... I thought I'd show you what I found for my parents for Christmas. I bought this at AC Moores. And, Yes! I took measurements and sketched out a pattern before I wrapped it up. I want to try and make it in miniature one day. I just think it's so cute:)
I hope everyone has had a great Holiday Season!
I will 'see' you in the New Year:)
 
Until Next Time:)


Thursday, December 13, 2012

Half way there and already deaydreaming...

I've finally found time this morning to sit down and begin loading the birdhouses in Etsy. I've got half of them done... and I'm going to try my hardest to keep going and get the the rest loaded, but I'm taking a break....
 
I've been using what was Katie's Corner as my backdrop for my store pictures lately. The pink walls seem to go with everything... and for now, I like the change. It's getting to cold for me to go outside...
So.... The Pink Bedroom has been packed away awaiting it's future home- ((I'm tired of Otis eating everything... so we're going to get one of those houses that hang on the wall that has a glass front..........oneday........))
But anyways..... for now... I get to play while I work. Shhhh.. don't tell anyone I'm having fun- they might use it against me:)
I listed the LIFE game Birdhouses... And this is the setting I set up to take pictures in. The dresser will one day make it over to the store, too.... but I can't figure out if I want to seal the drawers with Modge Podge or leave them like they are. I get hung up on the stupidest things sometimes!
....OK.... so if you look close- You will also see a blue mermaid. I just got a small order of these in, and still have to repaint and age them, but I think it will be a nice addition to the beach items I have in the store:)
 And while I'm here... I wanted to tell you what I found.... You may already know about it- But it was all new to me:) If you look on YouTube you can find Brambly Hedge movies.... And they have The Sea Story.... So I watched it the other night and took still shoots with my camera of some of the things I want to use. Like this window. I was wondering what that table looking thing was under the window in the family room. Turns out it's an inside shutter and they show you how it works...
 They also had the little details like the Shelf.... and the seahorse rocking horse, and the mermouse:) I took a lot of pictures but don't want to over due it today.... I'll share as I move forward with the build.
Think I'm gonna get some lunch and it's back to work I go:)
 
Until Next Time


Tuesday, December 11, 2012

When there's a will.... There's a way!

I don't have "real tools", as the bf would call them.
And I'm ok with that...normally.
Don't get me wrong.... I am starting to get to the point of wanting something more than a hand saw and an exacto knife... But we all know how dangerous the power tools are in My hands...
However... this wood on this little house is a pain in the butt to cut..... So

 I used a drill bit attachment in my Dremel as a jigsaw, so to speak.... and it did the trick. And I didn't hurt myself. lol
OK... So you see the new holes where the stairs are- this is where the two houses are going to join together to make one long house. All the cracks will get filled in so you'll never know the difference. And I went ahead and started building up the top floor. I want a box- so I'm using a piece of foam core board. After I get everything glued together- I'll go back and 'wrap' the outside in foam core too. Then I'll coat the outside in sand before it gets her grass hair:) But that's something I still gotta figure out.
Now that I've started this build, I'm having a hard time putting it down. This is usually my favorite part- the build.....It's the detail work that slows me down.

Until Next Time:)

Sunday, December 9, 2012

And How many projects are you working on?

I'm working on several...
I think that's how miniatures work- One project gets you hooked.... and then you get all ADD with it.. and through the years you add more houses... You know- cause the 3 you have sitting on your desk aren't enough to keep you busy, lol.
The gypsy wagon is a good example of this. I love this little 'house'. But I do Not like all the painting that is involved.... It's taking several coats- and it is sooooo boring.....
((I did change the colors since the last time I talked about it- the doors and window trim are now blue- And I love it!!))
All the trim will still be gold
 And the inside is going to be a light pink.....
 with blue accents.... I built these little shelves- there's going to be one on each side of the window- and I've got some scrapbook paper in there to make it a little more girlie:) I am so glad I changed it to a girlie wagon- it's just going to be the cutest thing- When I get it painted, lol....
 And then it happened again.
I've always love looking at Brambly Hedge pictures...
My Mom says she used to read them to me when I was little.
So a few weeks ago I ordered my first Big Girl books...
and have totally fallen in love. Now I do like all the ones you see all over the net- But I'm really in love with Sandy Bay:) You can find it in Sea Story.
 I think it's the beach. I'm just drawn to it.
And So...
a new project has been started:)
I took 2 of the puzzle houses from Michael's and have joined them together. This will be the top 2 levels of the house. At a later point I will add the bottom.....
Please excuse the mess- we were trying to figure out space and where what would go.
The bf helped- he assembled the stairs for me- I swear we spent an hour fussing over who the designer was and who the helper was. He was right though- the way I want it won't work- so I'm going to have to think on it...
 I cut out all the holes- took me all night to do this- I must invest in some real tools! We still have to cut out the holes between the 2 houses- After we figure out where and how the stairs are going it, lol. This might take awhile.....
I am so in love with this house. There's going to be so many things I can add... and living here at the beach is really going to help. I bet I can find all kinds of neat stuff to use.  
 And I love the over sized fire places...
I built one last night.
This is just my base. It's going to have seashells on the sides and I want to get the top to look like an old piece of drift wood.
I don't measure when I build... I just kinda use my guide (my gray bear) and build around it going from what I see in the picture. Not really good advice... But it works for me.
 Not sure if I'll use this blue cabinet- It was one of those things I built without a pattern- so it's not 1/12 scale (this whole project is almost 1/2 scale but a little bigger)... but I do love the cabinet.. and have always wanted to use it in something- and this project is going to have the right colors for it:)
 This is what the whole house looks like.
I'm working on the top 2 levels. Later I can go back and add the rest. I CAN NOT wait to do the grass:D I'm thinking another piece of carpet (like I did on Marshmallow Manor) but longer- Much longer. And maybe I can brush it out before I paint it to make it a little more fluffy? Most of the House will be coated in sand.
I'm excited about this project:) I just hope it doesn't take years to finish... I do tend to work slow:)
And before I go..
Thought I'd update you on the Chops:)
He's doing Great now.
There for a while he really had me sad. To the point where I was thinking about having him put down because I couldn't bare to see My Baby like that any longer. He had gotten to the point where he didn't want to even get up- and was using the bathroom on himself. So I rushed him back to the doctor... And the doctor told me he was just being lazy from all the babying he was getting... And that before we knew it he'd be up and running around. Well.... I guess Porkchops heard him, and realized the gig was up- because it was all up hill from there. He spend the better half of his time wallowing in our bed... then he started scooting... and before we knew it, he was up and walking across the bed. And then he was running across the bed.
...and then last night I was in the kitchen cooking and Someone decided it was time to get out of the bed and visit:) His legs will always be crooked, but at least I have my crazy Chop- chops back!
I do want to apologize about being so slow getting the store loaded up.
A week before Thanksgiving I had a wisdom tooth pulled and ended up with a dry socket that just doesn't want to heal. It's just slowing me down.....
I've got most of the signs in there- and I'm hoping to get the birdhouses loaded next week.
 
So
Until Next Time:)

Thursday, December 6, 2012

Let's talk Bricks

I've had Katie's Corner in a few houses over the years, and I always seem to outgrow it..
And then we got our hands on a fish tank.... and I sat for a looooong time trying to figure out how I wanted to do the walls. And then it came to me.... (That happens a lot! I'll feel completely clueless on how I want to tackle a project and it will sit for months, and then one day- It just makes sense:)
 
So....Katie's Corner was getting a brick wall. But not just any brick wall.....one that had been around for years. And one that someone had plastered over....but over the years that plaster had started to come off.....Am I making sense? I wanted an old wall! So.....
 
I used a piece of self-sticking- cork- scrapbook paper (well, I used 2 sheets) ...and began cutting out bricks. At this point the kids came in and saw what I was doing and asked me if I had lost my mind...lol....and actually after getting only this far- I was beginning to ask myself the same question- I needed a lot of bricks!
 But I had help:) Of course they are only good at keeping my lap warm and making sure nothing gets away, but Hey.....at least I don't get lonely- Cause you know the kids were Not sticking around to watch Mom glue bricks down.....lol
 This is really an easy process- It just takes ForEver!
I drew out lines where I wanted the bricks to be- this also helped me stretch out those 2 sheets of cork paper.
 After all the bricks were stuck in I went back in and painted the cracks gray. I wasn't careful about staying in the lines- this all seemed to blend together to make it look more like a whole piece in the end.
 I had a few bricks left over and decided I wanted some bricks to peek out from the stucco... so I used the same lines from before and added a few areas of bricks here and there.
 These bricks got 'stucco-ed' over. I am also starting to build up the layers of stucco to try and get it level with the bricks. This is the undercoat.
I have also went back and used watercolors to brighten up some of the bricks.
And then I did a light white wash over everything.
 OK...If you look closely at the next picture you can see there's different layers of blue stucco. I started with the white one the bottom......and let it dry. Then I added the next layer with a little bit of blue paint...and stucco-ed over the areas where the white was- but not overlapping, just slightly inside the white.....The I let that dry...then I added more stucco with more blue and did the whole thing over again. I did this process several times until I ended up with a texture I liked. I really hope I making sense here.
-This is where my two big frames are going to live- I was just making sure they were going to fit and that everything looked good together:)
 The last thing I did was dirty it up a little. Seems stupid after just doing the whitewash- but all these layers do show through- and make all the difference in the world.
I am so pleased with how this turned out:)
 I think it's perfect for a back wall in an old vintage store:)
 
Until Next Time...
 

Thursday, November 29, 2012

I haven't been far...

I've just been taking a break:)
 
Among other things, My computer died... and I was beside myself. However...sometimes not having a computer is a good thing. Because in the mean time- I've been able to do a lot of catching up. I finally got Katie's Corner in the fish tank. It was one of those things just had to sit down one day and do.... I will have other posts of what I did and what is what.... and I still have lots to still do...
 But I am so excited to have it done.... I just couldn't wait any longer to show you!! Almost all of my favorite things are in here!
 And since I'm here.... I thought I'd give you a sneak peek of what's to come in the store:) I've been working on Christmas signs. This one is a OOAK....each letter was stamped individually...where as I normally use a whole stamp. I like being able to make it custom:) I also ordered some better tree stamps... and a few other tiny stamps to help.
 This is something I've been wanting to make for a long time! And I'm really happy with how they turned out. I made 2... one with white stripes... and one with linen colored stripes.
 I had a few custom stamps made:) These are listed in the store.
 And I've finally finished up some birdhouses that have been half finished for forever now, lol. This one is from the boardgame LIFE. I used the little plastic buildings from the game board, 'redid' them and aged them with my Famous crackle finish:) I am so pleased with them!
 I've also made some birdhouses with some new bases...
There's so much to see:) But I'm going to save it for later! I will keep you posted as I get caught up...  I am still down a good computer. I have been forced to use the dinosaur- an old laptop that I think outdates the kids. Its slow, the images are blurry... and some of the letters only type when they want to.

Until Next Time...

Monday, October 15, 2012

But I don't like gold!

I started painting the gypsy wagon last night. I'm using the color Magenta by Folkart:) And I really, really like it... so far. Then I started trying to figure out what color I wanted to do the trim in...If you look close, you can see that I did one in light pink, one in yellow, and I used blue. But I don't like it. So I had a look at one of my Pinterest boards this morning and it hit me.
GOLD
I gotta do the trim in gold!
I'm just gonna have to learn to love it:)
 Here's the colors I started working with.... You know as well as I do.... these will change as I figure out what I want to do. There is still a lot to paint, but at least I got it started- Sometimes that is the hardest part:)
 Chops is still doing OK.... He hangs out in his tube most of the day...I think he feels safe in there:)
 And my last picture of the day is of JD..... I was taking pictures of an order I've been working on.. and as usual- He thought I needed help, lol. I love kitty shadows!!
Until Next Time...

Saturday, October 13, 2012

New Stamps

First... Let's start with where the idea came from...
I have my Gypsy wagon...my poor neglected, unpainted gypsy wagon. I had wanted to paint it yellow with green and red trim like the one in Wind in the Willows... Until I was introduced to Pinterest...lol...
Then I changed my mind and decided I wanted a girlie- pink- gypsy wagon. The critter that will live in it will be a fortune teller.Among other things, I wanted an Oujia board for her to have. So I found a rubber stamp in Cherry Pie Art Stamps store:) It's a little big for 1/2 (half) scale, but it fits perfectly on one of the walls inside the gypsy wagon.
 I also purchased this "Wheel of the Year" stamp. What witch doesn't need a pagan calendar?!
 These next stamps have been purchased over the past 2 years. This Palm Reading stamps is one of my favorites! I have so many books and notes on palmistry from when I was younger. One day I should try and redo some of that stuff in miniature, too....after I get a printer.
 This "Welcome to the North Pole" would be perfect in Santa's Workshop.... I'm on the hunt for Christmas stamps- but I'm just not finding images that would work. If I can see it 'hanging over a fireplace' then I know it will work for miniatures.
 This one a friend bought for me. I didn't notice it was a angel at first... And now that I do, I think it's perfect for all your shabby chic needs:)
 I spend a lot of time looking for the perfect rubber stamps to make my signs with! And I absolutely love it when I finish a sign, and it looks better than what I thought it would be! All of the signs shown today can be found in my store:)

And on the Home front...
We've been busy! A couple of weeks ago, we noticed that Porkchop was having a hard time walking- and his little 'knees' were swollen. So I took him to the vet, and turns out that he has not one but 2 broke legs. 2 breaks in each leg right in his 'ankles'. And we have NO idea how this happened. The vet said it looked like it had happened 3-4 weeks ago.... and that they were already starting to heal. So no casts... and no pain meds. Chops is in really good spirits and he doesn't seem to be in a terrible amount of pain... and the vet didn't want to give him pain meds because then he would think he felt better and would use his legs more. ((If he starts to act like he's in pain, I can pick up something for him.))
 And he's not allowed to play. Do you know how hard it is to keep a 10 month old kitten from playing? He's normally the holy-terror of the house (well behind Otis)... and he's just so pitiful now....
 You can see one of his swollen legs in the next picture. There still swollen, and I hope that's all it is. I'd hate for my baby to have crooked legs!
And as for me... testing went well. I have to wait to talk to the doctor, and when I know what's going on, I'll update my blog. But for now... I'm going back to bed. Chop-Chops needs a cuddle partner:)

Until Next Time:)